Wednesday, 27 May 2015

Mind Wide Open - When Tigers Wear Galaxies

Its been far too long since I've posted here! I'd love to get in the habit of posting every week at least, let's see if I can manage!

"Mind Wide Open" by Danielle Trudeau. 16"x20", acrylics on canvas.

I adore tigers, they're easily one of my favorite critters to paint. In fact when this piece was still in progress, it was one of three tiger pieces that were in different phases. They're just so damn pretty.

Awhile back I saw some cool galaxy paintings that someone on Etsy did (I didn't bookmark the listing and now I can't find the artist), and was totally inspired to paint some galaxy art of my own! Naturally I have to include a critter in all of my work so I sketched a bit until I came up with this.

Since painting anything space-related is a very new topic for me, it was a trial-and-error process. Definitely. I repainted the area entirely 3 times, and even still I would like to repaint it again! It was a fun thing to paint, but its not without its difficulties. Originally I didn't want to use the splatter method to create the stars (something about not wanting paint flecks on the walls...), but my attempts ended up looking too...predictable? The stars were not as random and natural looking as I would have liked. So I gave the splatter method a shot and it worked! And I somewhat managed to control it so there was only minor clean up, haha!
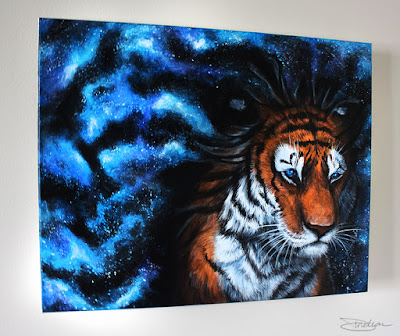
Angle view of Mind Wide Open Galaxy Tiger Painting
An angle view of "Mind Wide Open"

I was afraid the orange and blue combination would clash far too much, but I think it actually worked out okay!

This piece is painted with acrylics on a canvas that measures 16" x 20" (approximately 3/4" thick).

This piece is looking for a new home! It is currently for sale in my Etsy shop here!

Wednesday, 9 July 2014

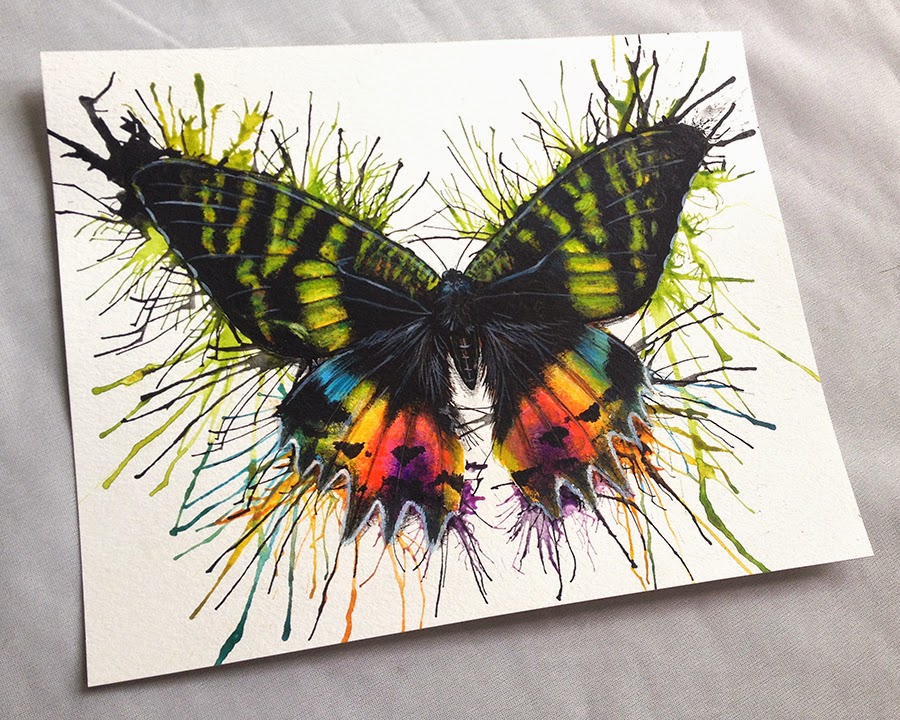
Butterflies and Moths - With An Edge

So I'm not a fan of bugs.

I'm more like a gets-deep-spine-shivers-of-terror kind of gal when it comes to creepy crawlies.

Yet I completely adore moths and butterflies. I mean, who doesn't? There is so much amazing variety in their shapes, sizes, colours and patterns. They're stunning.

So naturally they show up a lot in my artwork.

I'm not sure how I came upon this technique, but it works wonders with snazzy colourful subjects like butterflies and moths.
And it leaves you very light-headed.


First one, a made-up girly little thing.

 
Swallowtail Butterfly

This one was a volunteer piece for my university's Graduate studies journal.

Both of these are African species that were done as a commission for a biologist from Russia.


Blue Morpho


Sunset Moth
This one was a commission.


Luna Moth
[For Sale]

Enjoy!
- D

Monday, 23 June 2014

Lady the Kirin - Sculpture

I've been in a sculpture mood as of late, creating mystical beasts is wonderful.

This is Lady the Kirin, a pretty quiet little thing. 


Tuesday, 20 May 2014

Recent Pastel Craze - Finished Pieces


Way back in 2008 I was introduced to soft pastels as a medium, and something else that has captured my heart since that time - velour paper!

I've only used soft pastels on two types of surfaces, watercolour paper and velour. And let's just say that I will not be doing more work with the watercolour paper.

Velour is a nifty paper that actually has a layer of fibres on one side, imagine something similar to velvet. The fibres capture the pastel dust perfectly, the colours are vibrant and in my eyes it gives everything a lovely dream-like quality. I simply love the stuff.

I took a break from the medium for a few years, and finally felt the urge to give it another shot recently. That sent me digging through my supplies for my trusty soft pastels and velour paper!

Tuesday, 29 April 2014

Wednesday, 23 April 2014

Bighorn - Mixed Media with a walkthrough!


Now and then I get the opportunity to do an excellent commission, something that feels like fun time rather than work time.


This piece is a mash-up of mediums. The paper was dyed with tea, then baked in the oven on low with a sprinkling of coffee grounds for more colour and texture, then painted.

First step was a rough sketch with a mechanical pencil, knocked down some details. 


Inked those lines with an assortment of Staedtler and Faber-Castell fine liners. I typically use an assortment of pens for my artwork, but these lines needed to survive through a good soaking, hence the use of my waterproof \staedtler and Faber-Castells. Got rid of my pencil lines to avoid any sort of water-soaking mishaps.


I mixed up a strong brew of cheap Earl Gray tea, cutting open the tea bags to release the leaves for their texture. Settle that paper onto a baking sheet, poured the tea in and piled the leaves on the surface of the paper.

Next step was to let that soak for as long as you can manage (usually I let it sit for at least an hour). I got impatient and pulled it out of the tea after 20 minutes, which resulted in it being paler than I would have liked. I drained the tea but left the leaves on top, then sprinkled some coffee grounds (the paper still smells heavenly) onto the surface and popped it in the oven at 200-250 degrees F for around 10-15 minutes. Make sure you watch it, although I've been lucky so far and haven't experienced any burning.
I never leave the paper in until its completely dry, usually I let it sit overnight to let it dry, then rub all of the leaves and coffee grounds off.
Look at all that lovely texture! The ink sketch becomes pretty tough to see at this point, but its still there!

Now the painting begins. I decided to use watercolours to start bringing out some tones and shapes.


Then I brought out some details with white acrylics.
And then I do it again. I bounce back and forth between the watercolours and the acrylic until I'm happy with the details and tones.
Keep at it until you're done! Voila!


Here are some close-up photos of the detail and texture.


Enjoy!

- Danielle